How to Upgrade Windows 10 to Windows 11 Without Losing Data
Upgrading your operating system doesn’t have to be stressful. If you’re planning to upgrade Windows 10 to Windows 11 without losing data, this guide is here to help. By following these simple steps, you can transition seamlessly while preserving your files, apps, and settings.
Why Upgrade Windows 10 to Windows 11 Without Losing Data?
The decision to upgrade comes with exciting benefits. Windows 11 introduces a fresh interface, advanced gaming features, and enhanced security. However, ensuring a smooth process without data loss is essential. By learning how to upgrade Windows 10 to Windows 11 without losing data, you’ll avoid unnecessary hassles and keep your important files intact.
Step 1: Check System Requirements
Before you begin, it’s essential to confirm that your device meets the minimum requirements for Windows 11. Here’s what you’ll need:
- Processor: At least 1 GHz, with 2 or more cores on a 64-bit processor.
- RAM: 4 GB or more.
- Storage: A minimum of 64 GB.
- Graphics: DirectX 12 compatible.
- TPM: Trusted Platform Module (TPM) version 2.0.
To make this step easier, download and use Microsoft’s PC Health Check Tool. This tool will quickly verify your system’s compatibility.
Step 2: Backup Your Data
Even though the upgrade process typically preserves your files, it’s better to err on the side of caution. For instance, you can:
- Use File History:
- Navigate to Settings > Update & Security > Backup.
- Set up an external drive and enable the backup option.
- Rely on cloud storage:
- Services like OneDrive, Google Drive, or Dropbox are great for safeguarding important files.
- Create a system image:
- Tools like AOMEI Backupper or the built-in Backup and Restore (Windows 7) utility work well for this purpose.
By taking these precautions, you’ll ensure your data is safe in case of unexpected issues.
Step 3: Update Windows 10
To avoid potential errors during the upgrade, it’s crucial to have the latest updates installed on your current operating system.
- Open Settings.
- Go to Update & Security > Windows Update.
- Click Check for updates and install any pending updates.
Regular updates not only improve compatibility but also enhance overall system stability.
Step 4: Enable TPM 2.0 and Secure Boot
For the upgrade to proceed, enabling TPM 2.0 and Secure Boot is mandatory. Don’t worry—this process is simpler than it sounds.
- Restart your PC and access the BIOS/UEFI settings.
- Typically, this requires pressing keys like F2, DEL, or ESC during startup.
- Once in the BIOS, enable TPM under the Security section.
- Similarly, navigate to the Boot tab and activate Secure Boot.
These steps help ensure your system meets Windows 11’s security standards.
Step 5: Download the Windows 11 Installation Assistant
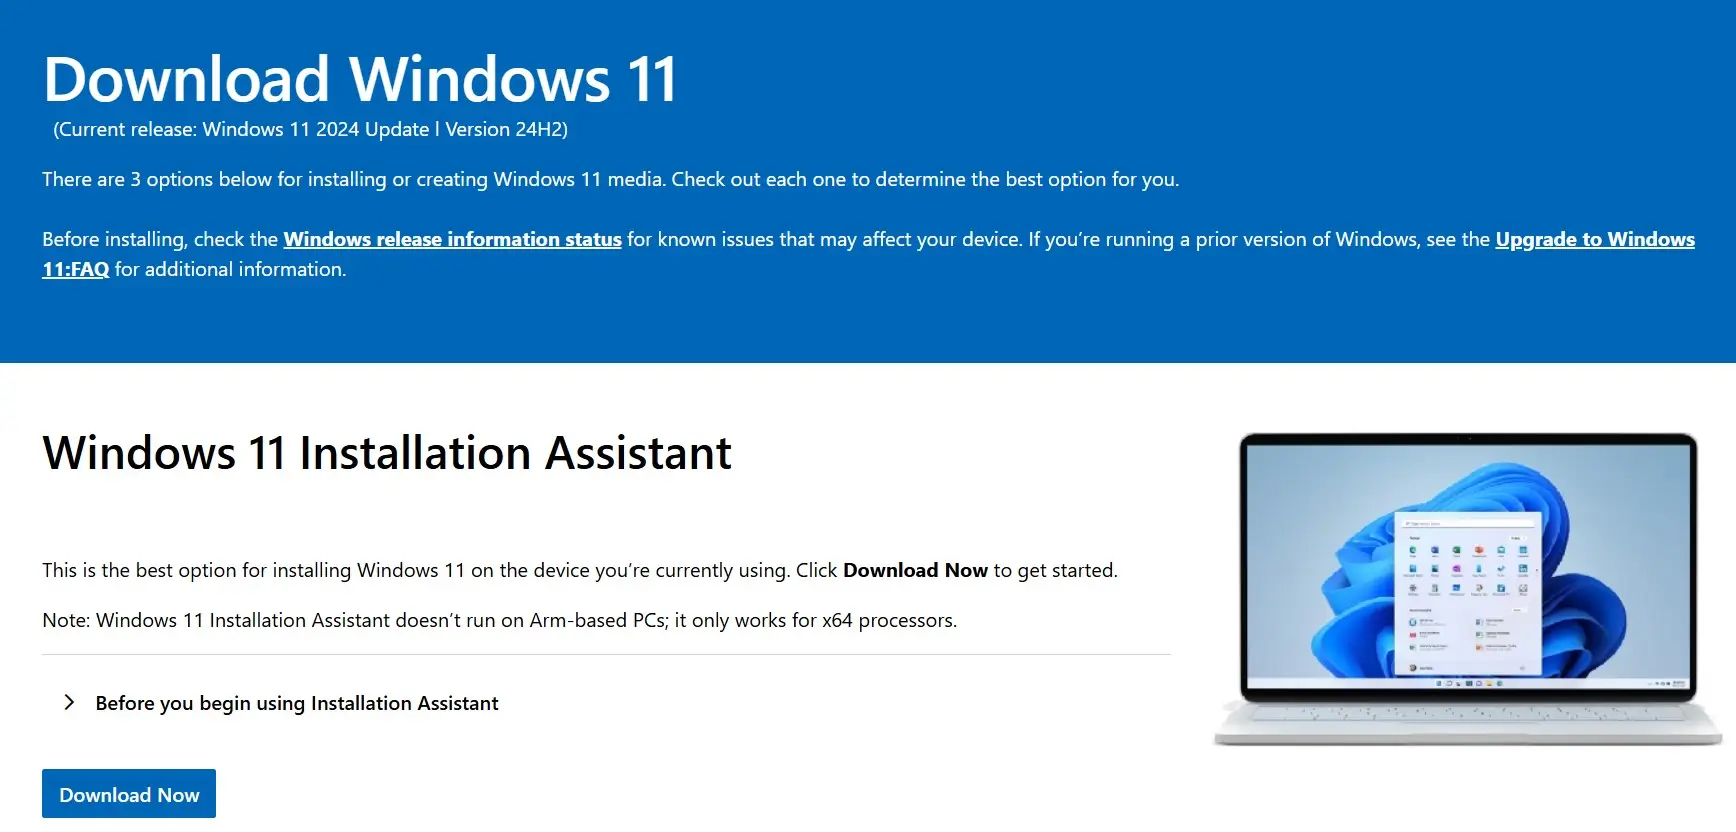
Next, you’ll need to download the Windows 11 Installation Assistant from Microsoft’s official website.
- Visit the Windows 11 download page.
- Click on Download Now under the Installation Assistant section.
- After the download is complete, run the tool and follow the instructions.
Step 6: Begin the Upgrade Process
With the Installation Assistant ready, you’re all set to start the upgrade.
- Launch the tool and accept Microsoft’s terms and conditions.
- Once your system passes the compatibility check, select the option to Keep personal files and apps.
- Click Install and let the process run its course.
It’s important to stay patient during this step, as the installation may take some time.
Step 7: Post-Upgrade Tasks
Finally, after the upgrade completes, take a few moments to ensure everything is in order.
- Check your files to confirm nothing is missing.
- Verify that all apps are functioning as expected.
- Install any remaining updates by visiting Settings > Update & Security > Windows Update.
By double-checking these details, you can enjoy a smooth transition to Windows 11.
Troubleshooting Common Issues
Occasionally, you may encounter minor hiccups during the upgrade. For instance:
- Low Storage Space: Use Disk Cleanup to free up space or connect an external drive.
- Compatibility Errors: Double-check that TPM and Secure Boot are enabled.
- Slow Installation: Disconnect unnecessary peripherals to optimize performance.
Addressing these issues promptly will save you time and frustration.
FAQs
1. Will I lose my files or applications during the upgrade?
No, as long as you choose the Keep personal files and apps option, your data will remain intact.
2. Can I revert to Windows 10 after upgrading?
Yes, within 10 days of upgrading, you can roll back via Settings > System > Recovery.
3. Is the upgrade free?
Yes, Windows 11 is free for all licensed Windows 10 users.
Conclusion
Upgrading from Windows 10 to Windows 11 is an easy process if you prepare correctly. By following this guide and ensuring proper backups, you can enjoy the latest features without any risk to your data. Upgrade today and experience a faster, more secure operating system.
Thank you for visiting our website! We hope this guide helps you achieve a smoother and faster Windows experience. Do check out our other tech tips and visit again Fyss.in for more solutions.


I think that everything said was very reasonable. But, what about this?
suppose you added a little content? I mean, I don’t want to tell you how to run your blog, however suppose you added a headline that makes people desire more?
I mean How to Upgrade from Windows 10 to Windows 11 Without Losing Data
is kinda boring. You might peek at Yahoo’s home page and
note how they write news headlines to grab
viewers to click. You might add a related video or a related pic
or two to grab people excited about everything’ve written.
In my opinion, it could bring your website a little livelier.
Thanks for your valuable feedback! 😊
You’re absolutely right – adding a better hook and some visuals can really help.
I’ll update the post soon with a more engaging headline and a few helpful screenshots/videos.
Appreciate your insight!